
Submitting receipts for your Reap transactions
Overview
Reap offers multiple ways to submit receipts for your Reap Card transactions. Whether you're on desktop or mobile, it's easy to keep your expenses organized by attaching receipts directly to transactions.
Ways to submit receipts
You can submit receipts through the following methods:
Via Reap Dashboard (Web)
Log in to your Reap account at dashboard.reap.global.
Go to the Reap Card section and click on the Transactions tab.
Locate the transaction you want to update and click on it.
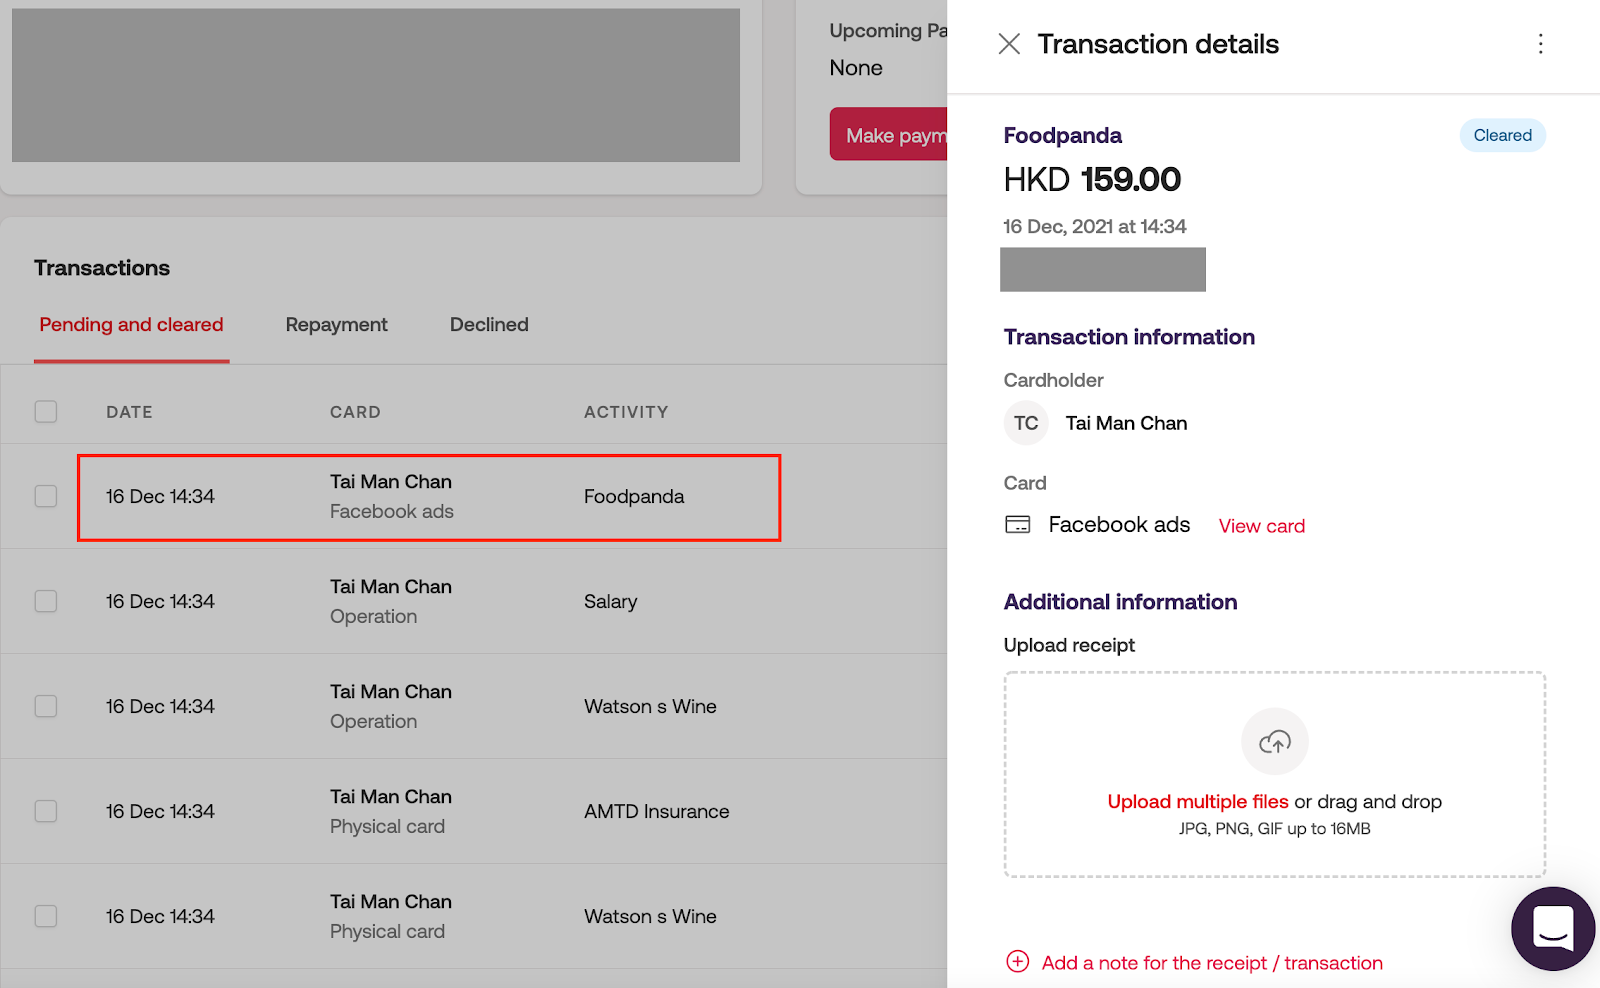
In the expanded transaction details, click Upload Receipt.
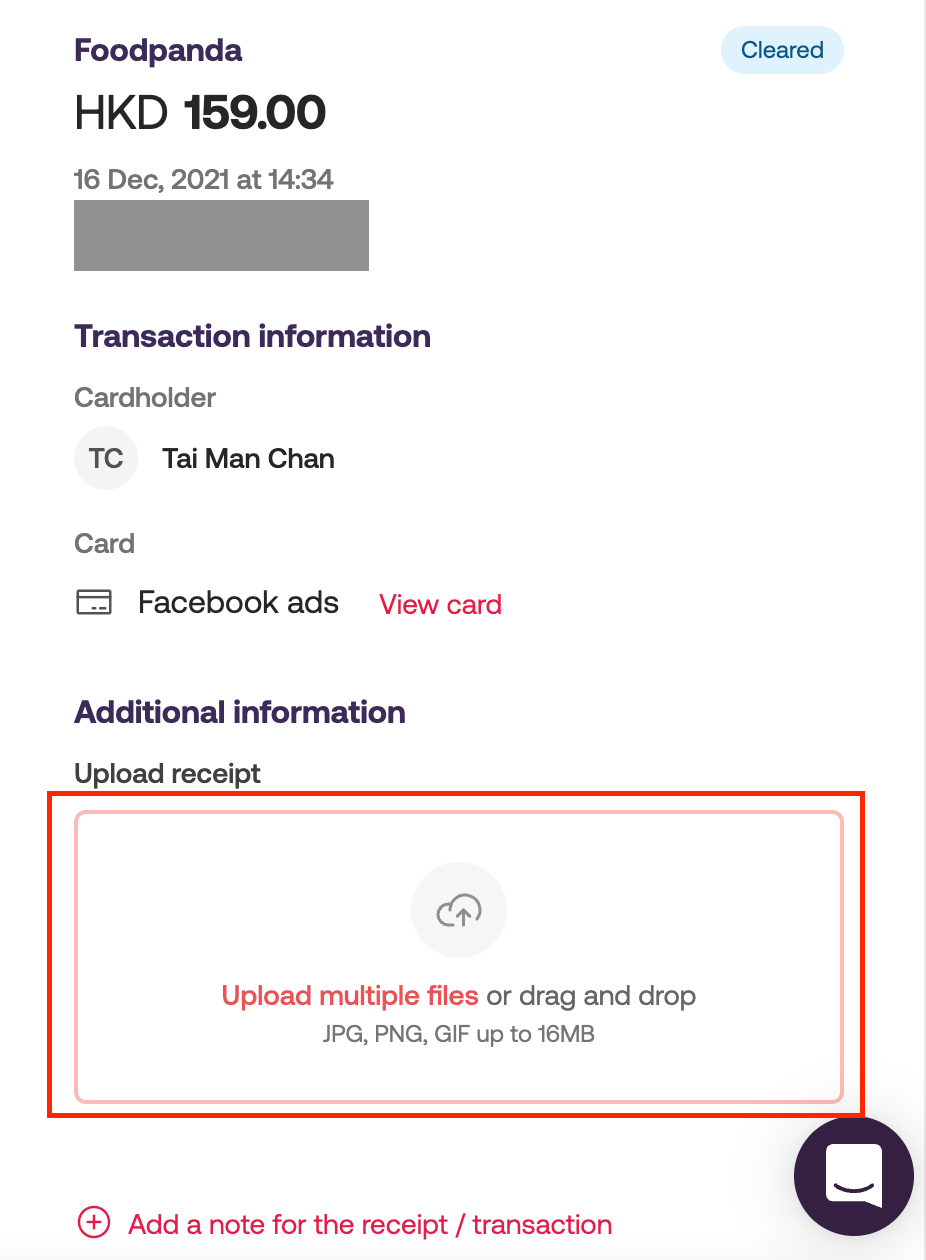
Select the file from your computer (supported formats: PDF, JPG, PNG) and click Open.
(Optional) You may also edit the category or add a note to your Reap Card transaction.
Click Save.
Via Reap Mobile App
You can also submit receipts and add notes directly from your smartphone.
How to upload a receipt:
Open the Reap mobile app.
Tap the All Transactions tab.
Select the transaction you’d like to update.
Scroll down and tap the “+” icon to upload a receipt.
Choose one of the following options:
Take a photo using your phone’s camera.
Select an image from your camera roll.
Tap the ✅ checkmark to upload the receipt.
The system will scan the receipt and attempt to match key details (e.g. merchant and amount). Once complete, tags will appear at the bottom of the transaction page summarizing the scan results.
How to add a note:
Need to provide additional context for your team? You can add notes to any transaction.
Open the desired transaction in the Reap mobile app.
Scroll to the bottom to find the note text area.
Type your note — it will be saved automatically.
Via Email
Reap supports submitting receipts by email. Users can send receipts as attachments to a designated email address, and these will be automatically matched and attached to the corresponding transactions.
This powerful yet simple feature transforms the way teams handle expense documentation by:
Saving time: Skip the manual upload and let receipts flow in via email.
Reducing workflow friction: Ideal for teams dealing with a high volume of transactions.
Minimizing error: Automatic matching ensures receipts are correctly linked to the right expenses.
Increasing flexibility: Easily forward digital receipts from your inbox or third-party platforms like AWS, travel booking services, or vendor emails.
How it works:
1. Log in to your account on the Reap Dashboard
Access your account at dashboard.reap.global.
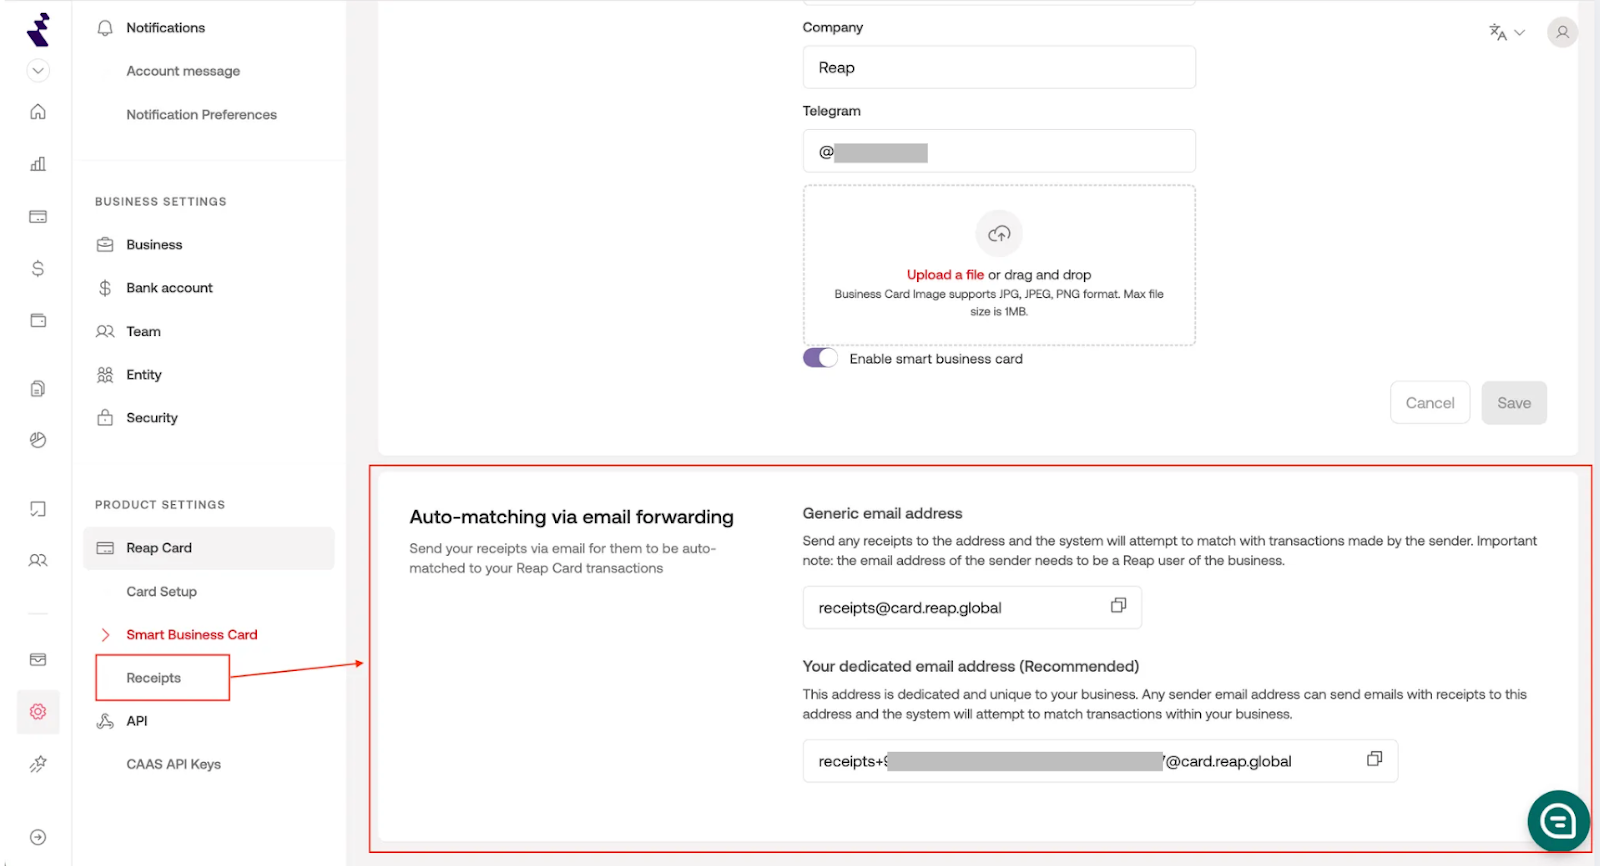
2. Go to Receipts
Click Settings in the sidebar.
Navigate to Product Settings > Receipts.
3. Submit your receipt(s) via email
Users can email receipts to receipts@card.reap.global or using a dedicated email address for their company.
4. Receipt details are scanned and matched to a transaction
Submitted receipts are analyzed to automatically match them with the correct transaction.
5. Receive a status email
After the receipt has been processed and the matching attempt is complete, the sender will receive an email notification. This email will indicate whether the receipt was successfully matched to a transaction or if no match was found, along with a summary of the result.
Pro Tips
Supported formats: PDF, JPG, PNG
Ensure receipts clearly show:
Transaction date
Merchant name
Total amount
FAQs
Can I send multiple receipts in one email?
Yes! However, we recommend sending one receipt per email to maximize matching accuracy.
What happens if the receipt tool can’t find a match?
The sender will receive a summary email confirming whether each submitted receipt was matched successfully or requires manual review.