How to create a virtual card?
This article is a step-by-step guide to creating virtual cards. It covers setting card types, budgets, cardholders, spend limits, expiry dates, time restrictions, and top-up credits.
Navigate to https://dashboard.reap.global/dashboard/home
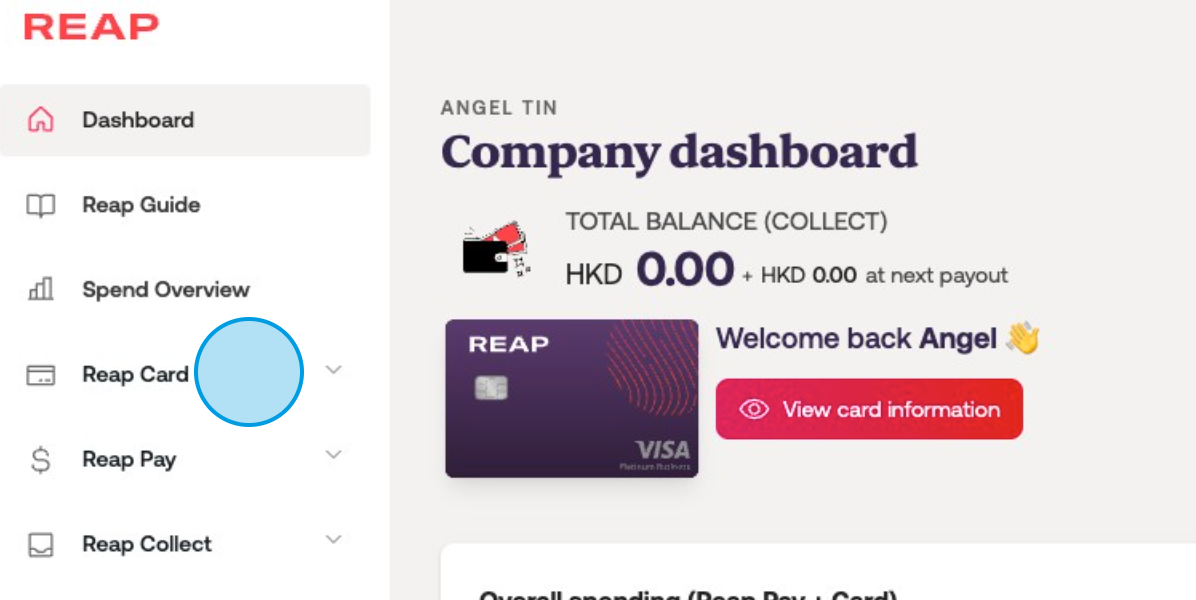
Click on "Reap Card."
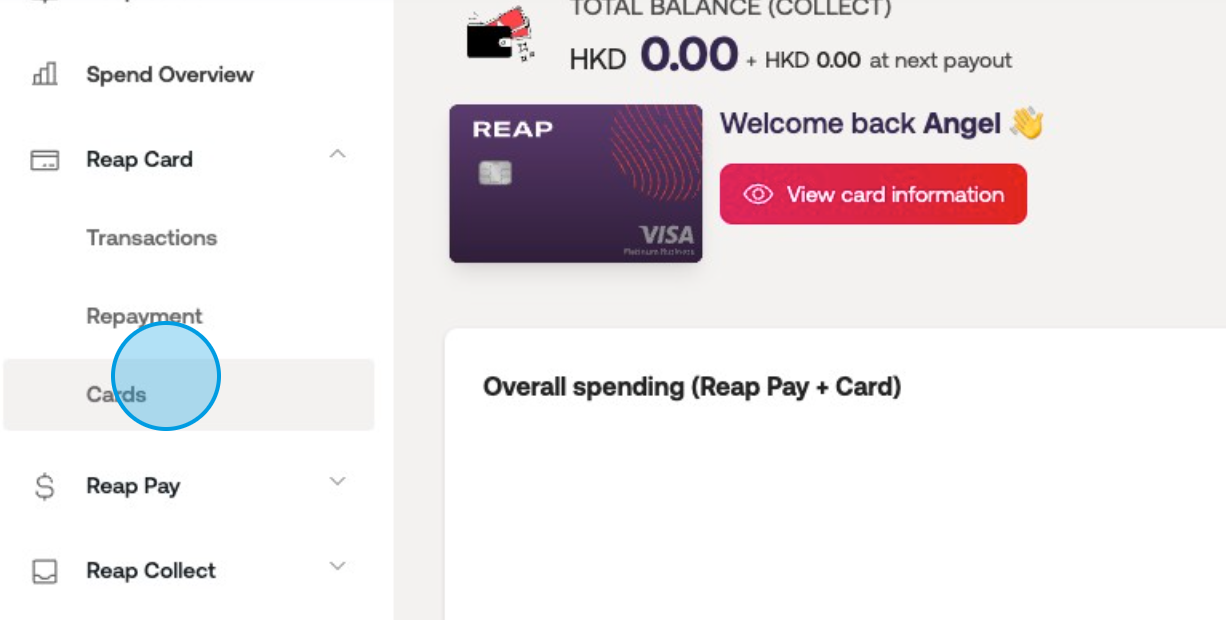
Click on "Cards."
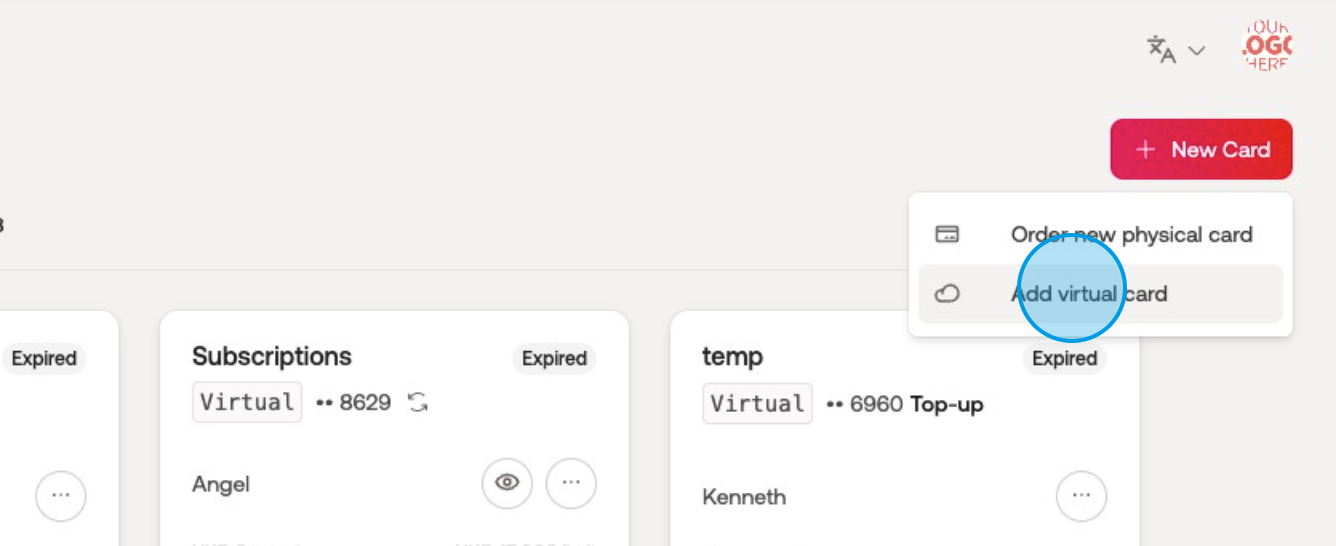
Click on "New Card."
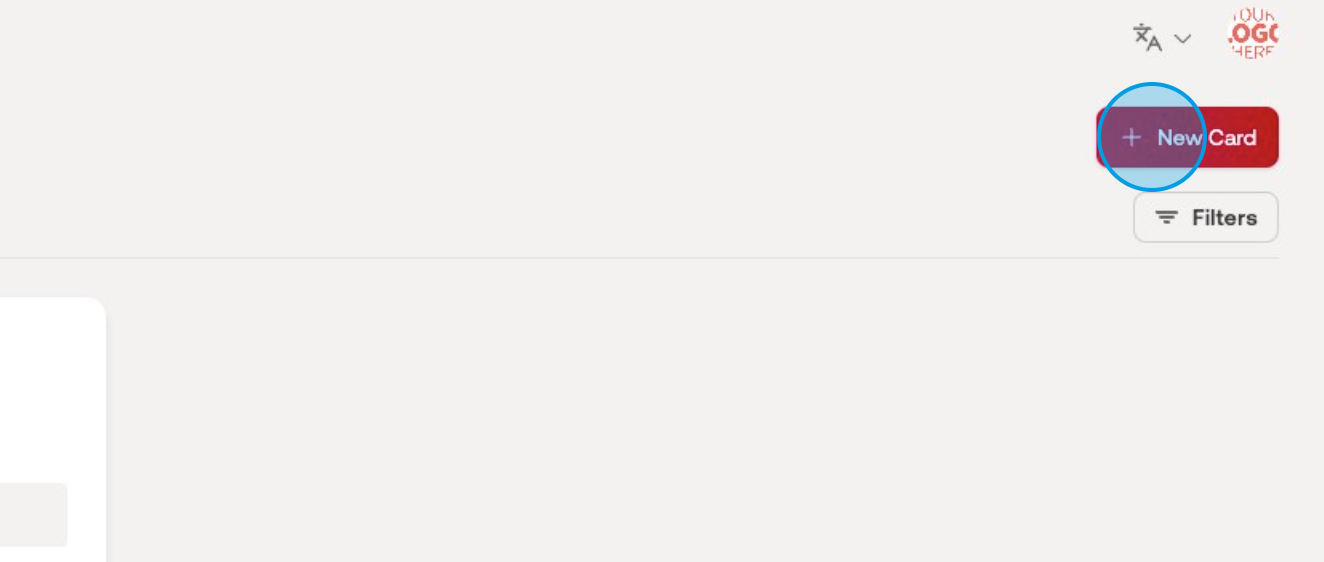
Select "Add virtual card."
Selecting the Budget
Choose the budget for the card, and Click "Confirm."
You can create budgets to separate spending into different pools. For example, within the Marketing Online Advertisement budget, you can create a Google Ads card. This enables the marketing team to set a total spending limit for all ad platform cards combined. Such budgeting facilitates efficient expense management and tracking for specific purposes.
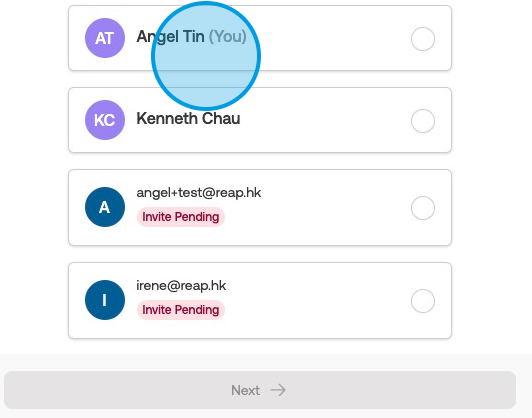
Selecting Cardholder
Select the cardholder, and Click "Next."
Create a card title.
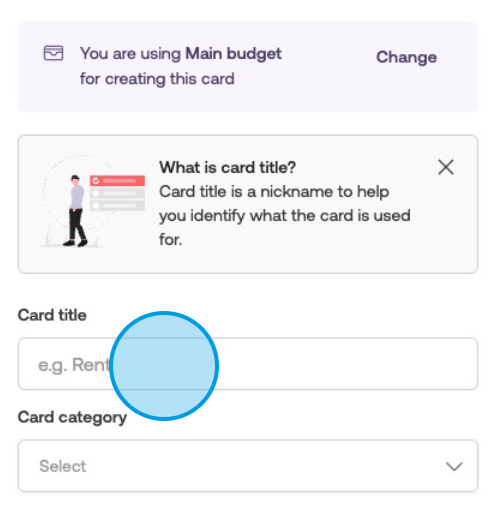
Select a card category, and Click "Next."
After you have set the card category, all expenses in this card will directly be mapped to this spend category.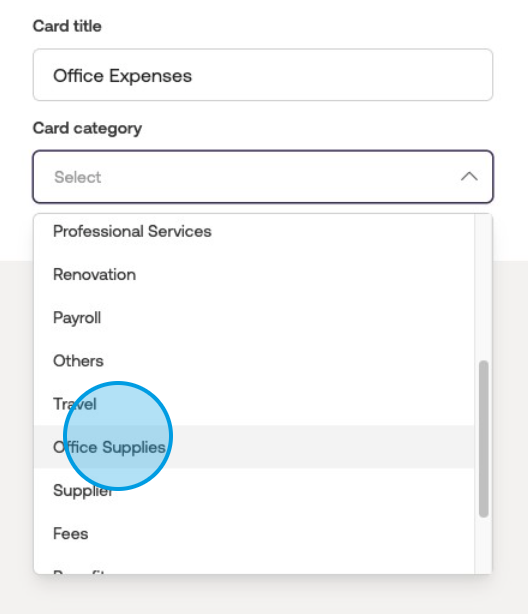
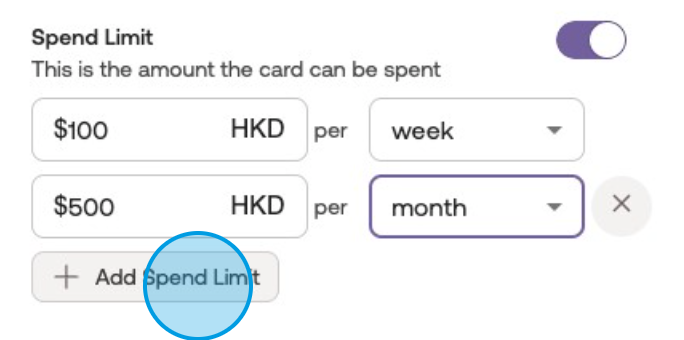
Setting up a Recurring Spend LimitToggle the spend limit option and adjust the amount and credit limit refresh frequency, to enable recurring use of the allocated spend limit.
You can choose to refresh the limit on a daily, weekly, monthly, annual, and/or all-time basis based on your preference. This allows for flexible control over the card's spending capabilities within the defined limits.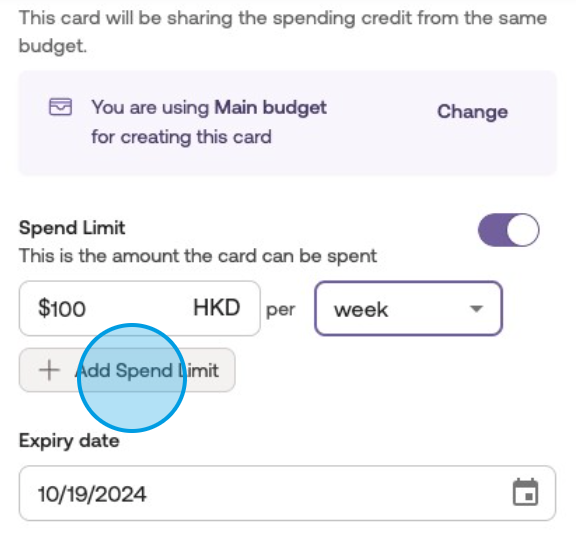
Choose multiple spend limits if desired.
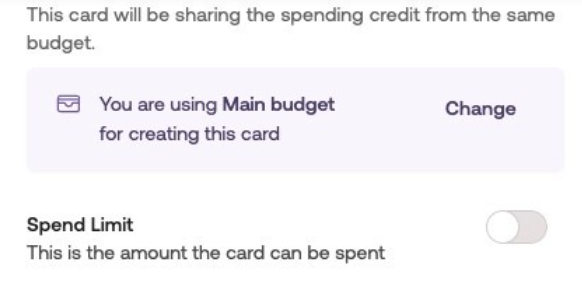
Setting a Card without Spend Limit
Toggle off the spend limit option to create a recurring card without a spend limit.
By doing so, the card will allow staff members to utilize the entire unspent and unallocated balance of the desginated budget. This provides greater flexibility and unrestricted access to the company's funds for the designated card.
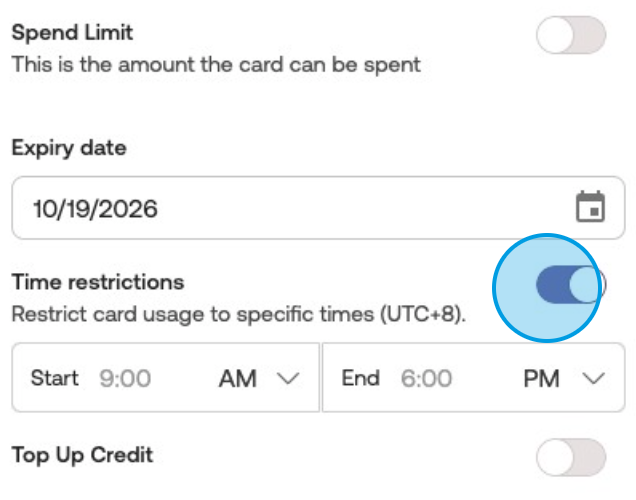
Selecting the Expiry Date
If you wish to change the expiry date, please click on the calendar button, and choose the date of expiry.
The minimum validity of a card is 1 month after the card creation date, and by default, a card is set to expire one year after the card creation date.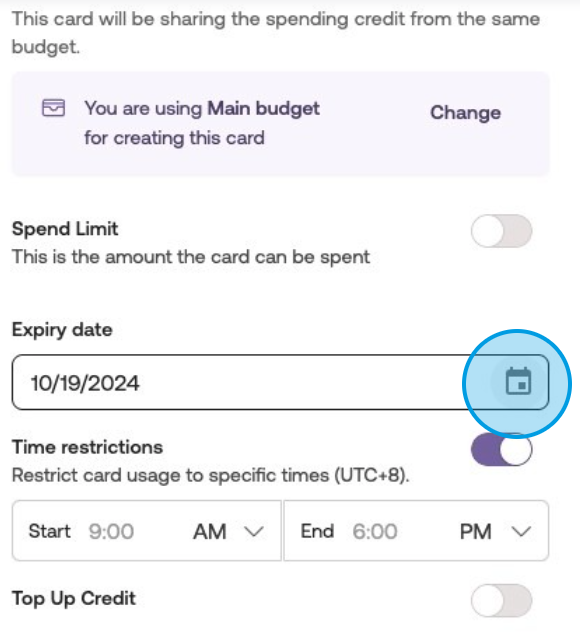
Setting up Time Restrictions on Transactions
(Optional) Turn the time restrictions toggle on to limit card usage time.
Reap Card allows time restrictions to control expenses during designated periods. Please avoid setting time limits for subscription payments to prevent declines. Use time restrictions primarily for in-person transactions, like enabling staff to use the card after 8 p.m. for late-night taxi rides home after work.
Setting up a Top-up Spend Limit
(Optional) Add a top-up credit to the card.
Top-up credit immediately reserves a portion of the budget for a new card. It ensures exclusive access to the designated budget, and repayments or spending remove the reservation. For example, a virtual card with a HKD 1,000 monthly fee and a HKD 5,000 top-up credit for a one-time implementation fee. Please note that an extremely high top-up may limit other cards' spending ability until the next repayment.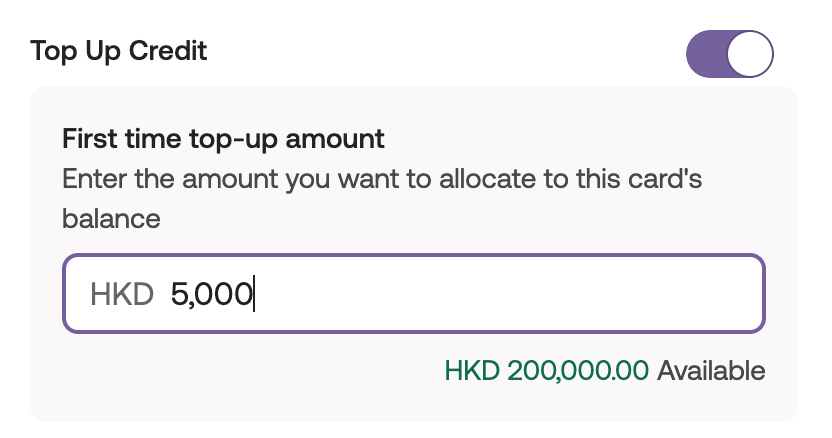
Click "Next" to continue.
Confirm and Create Card
Confirm all the details and click "Create card" to proceed.
You cannot edit a card's type, category, expiry date, and budget after creation, please make sure to check it carefully.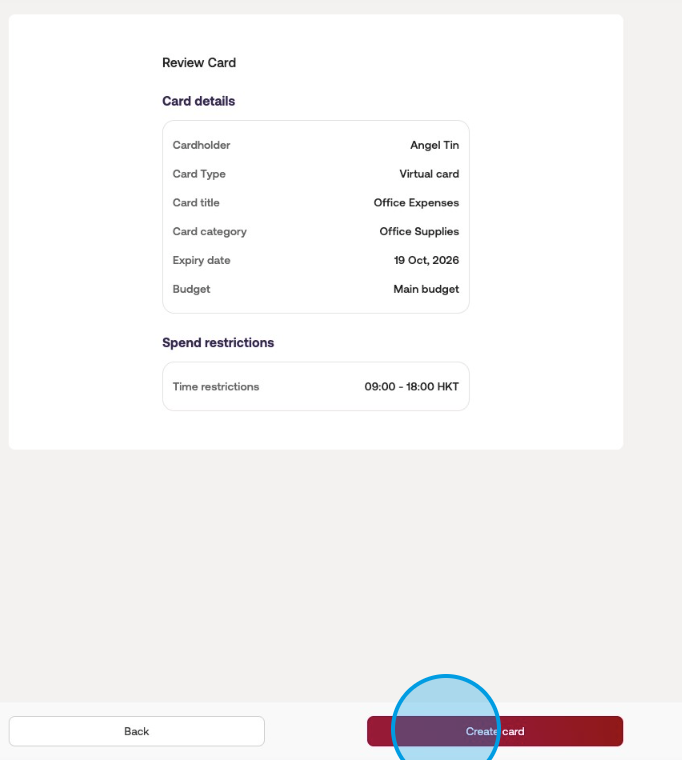
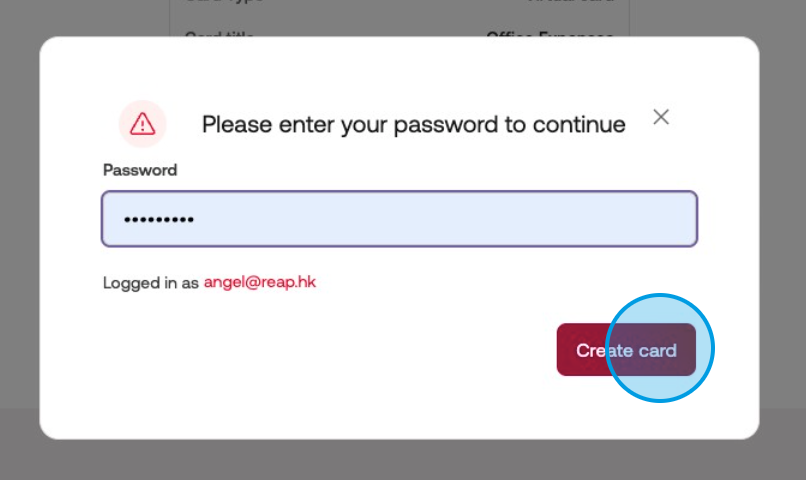
Retype the password to confirm the card creation, and click "Create card" as the final step for card creation.