How to Create an Approval Policy?
The approval feature is targeted to allow enterprises to have their approval authorisation process done in the Reap dashboard.
To start with, we have enabled users to request and approve Reap Pay payments before Reap sends them to the recipient. In the future, we are aiming to unlock more features on approvals, including but not limited to virtual card creation.
Please note that you must be marked as an admin in the Reap dashboard to be able to create an approval policy.
Please click here for an interactive demo or refer to the step-by-step guide below.
To set up an approval policy, follow these steps:
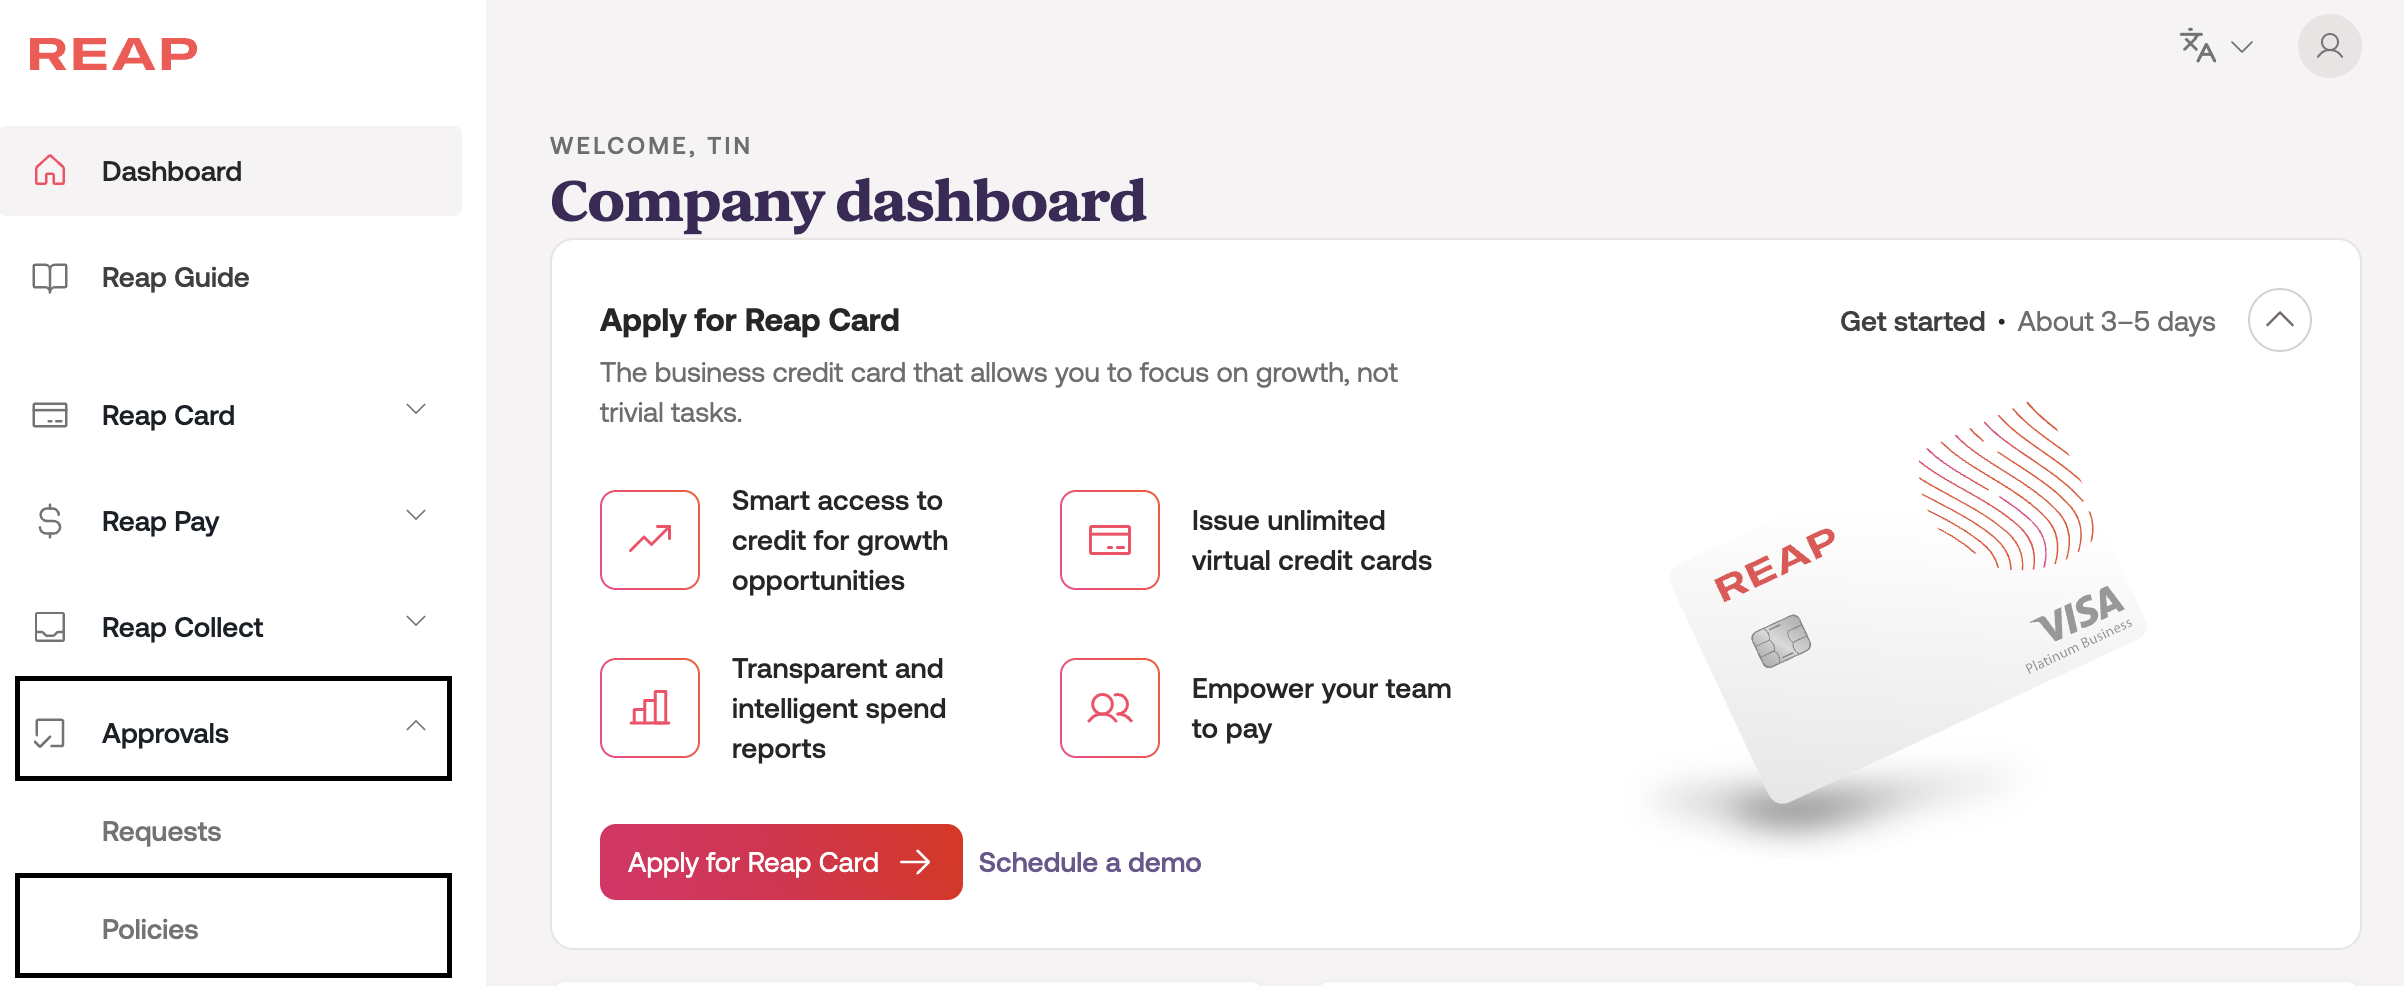
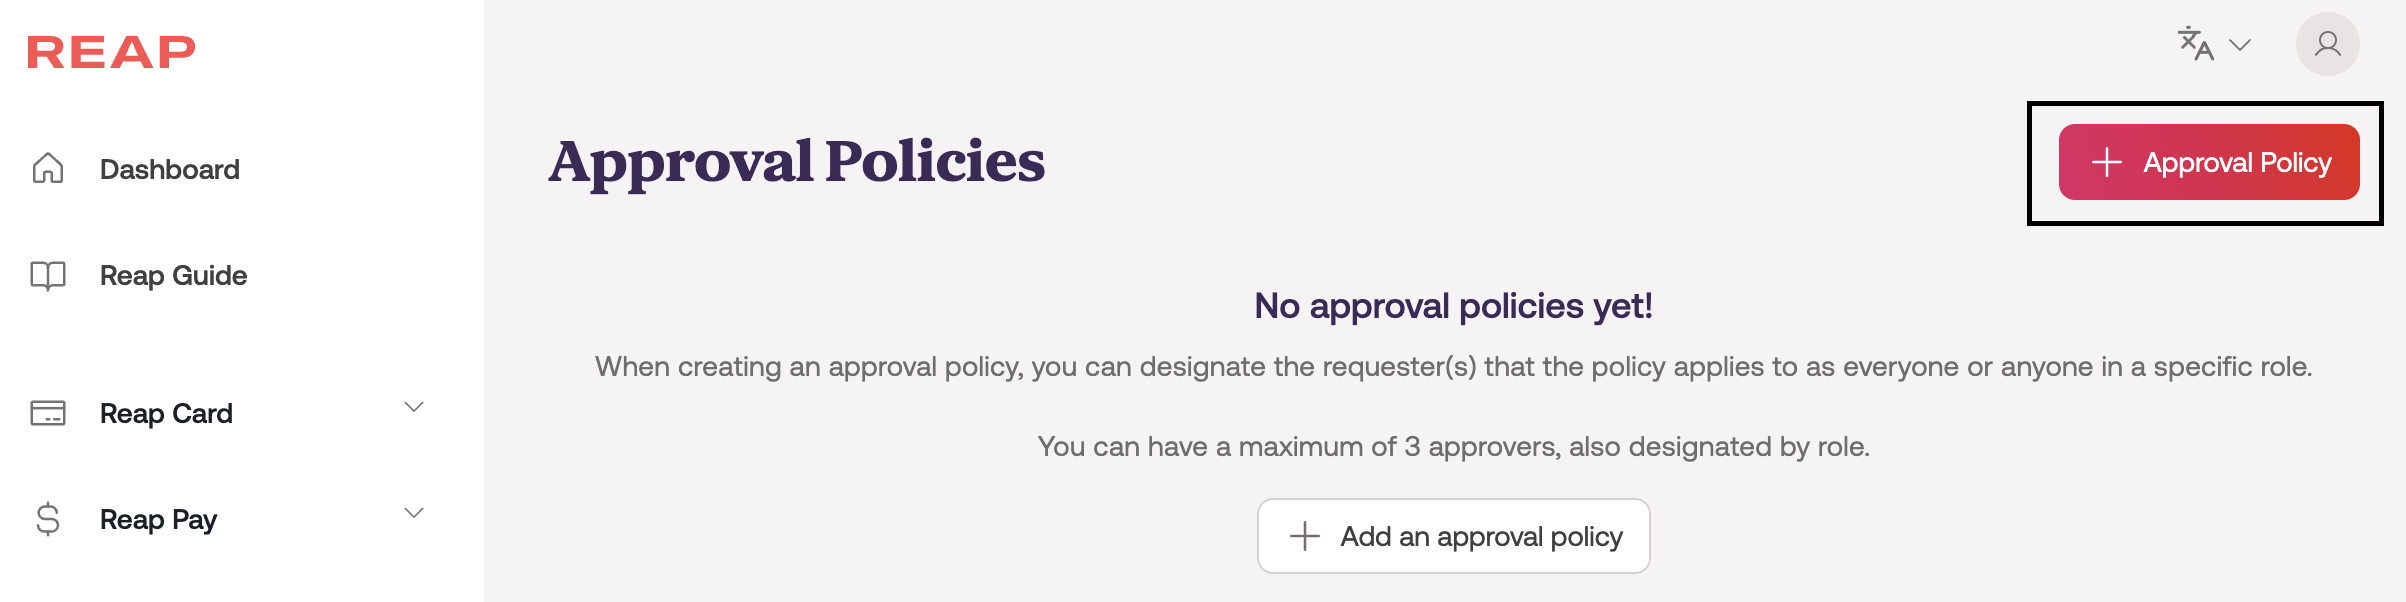
Click Policies under Approvals in the menu bar.
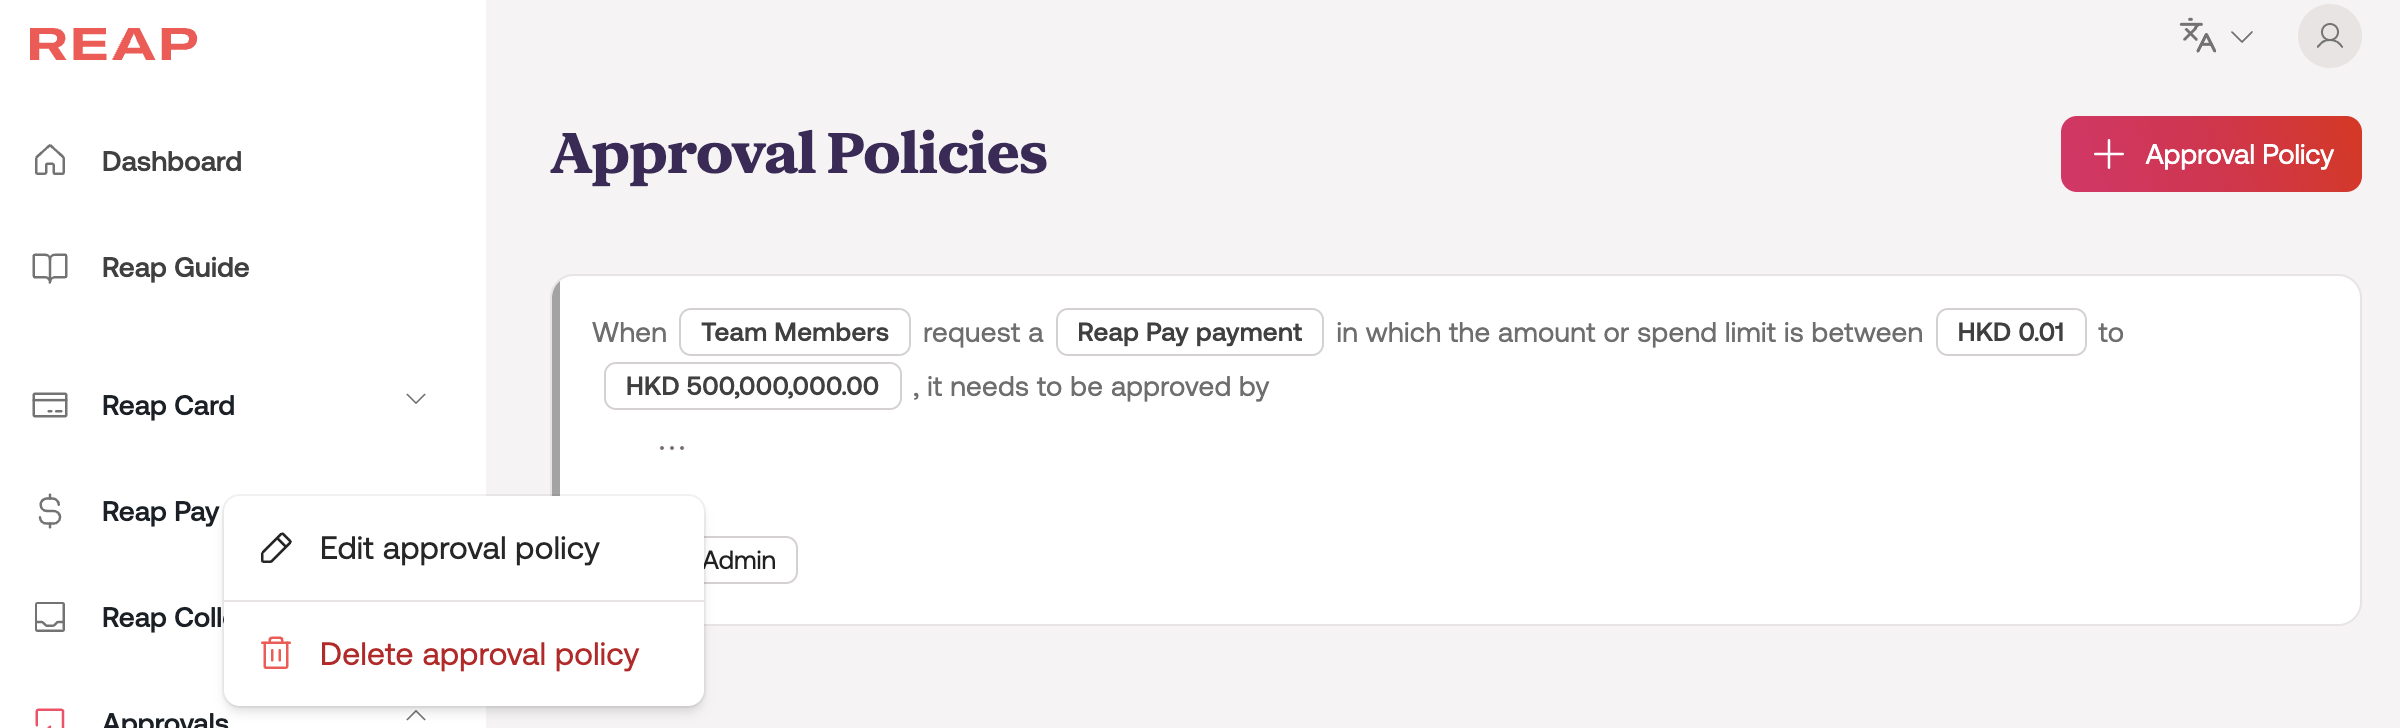
Click the + Approval Policy button to create a new spending policy. Please refer to the following example for reference, then create your own policies in the dashboard!
Sample Policy: Every Reap Pay payment created by any team member should be approved by at least one admin before the payout is submitted to Reap.
Set up the four variables in an Approval Policy
Requester: click 'Add role' and pick the requester.
In the sample case, click team member in the dropdown menu.Type of request: select 'Submit a Reap Pay payment'
Amount: set the threshold on the transaction amount that requires approval
In the sample case, to review all Reap Pay payments, please input the range as $0.01 - $500,000,000.Approver: select the approver, which will be 'Admin'.
E.G.: Admin can choose who should be the approver of this type of transaction.

Double-check that the policy details are on the confirmation page. Once confirmed, please click 'Create Approval Policy'.
How do I manage an Approval Policy?
If you wish to edit or delete an existing policy, you can click the Options ⋯ button in the specific policy to do so.